Categories
Deep Sky Nebula

Barnard 15

I haven’t posted here for a while now. I post most initial looks at data sets on the Breckland Facebook page so this is the place to visit for the most up to date information. However, I will endeavour to keep this page reasonably current.

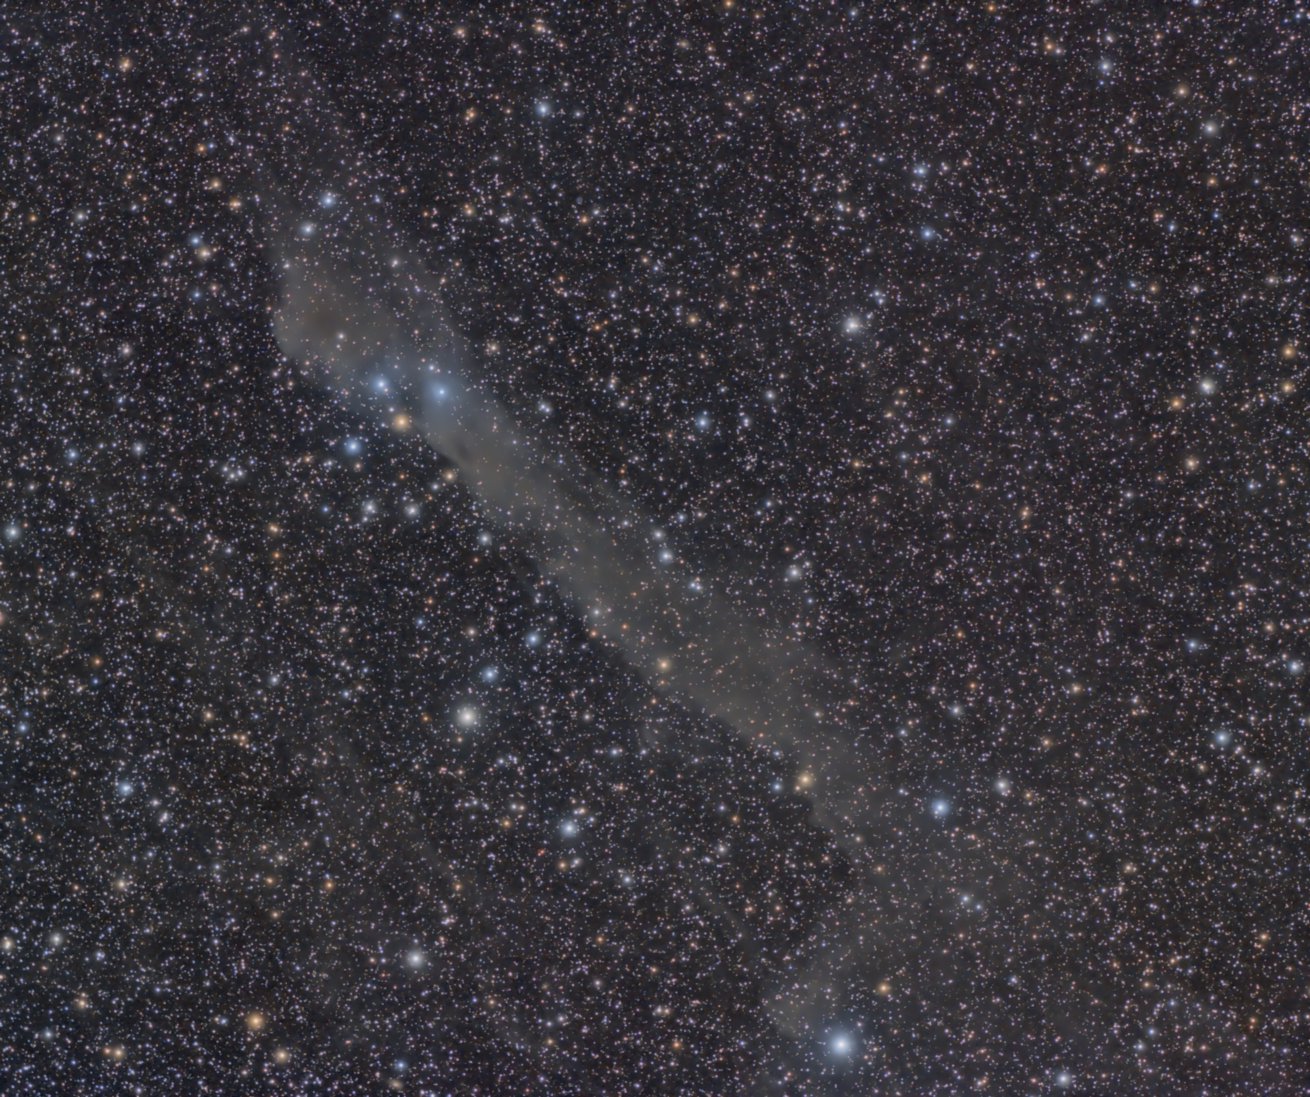
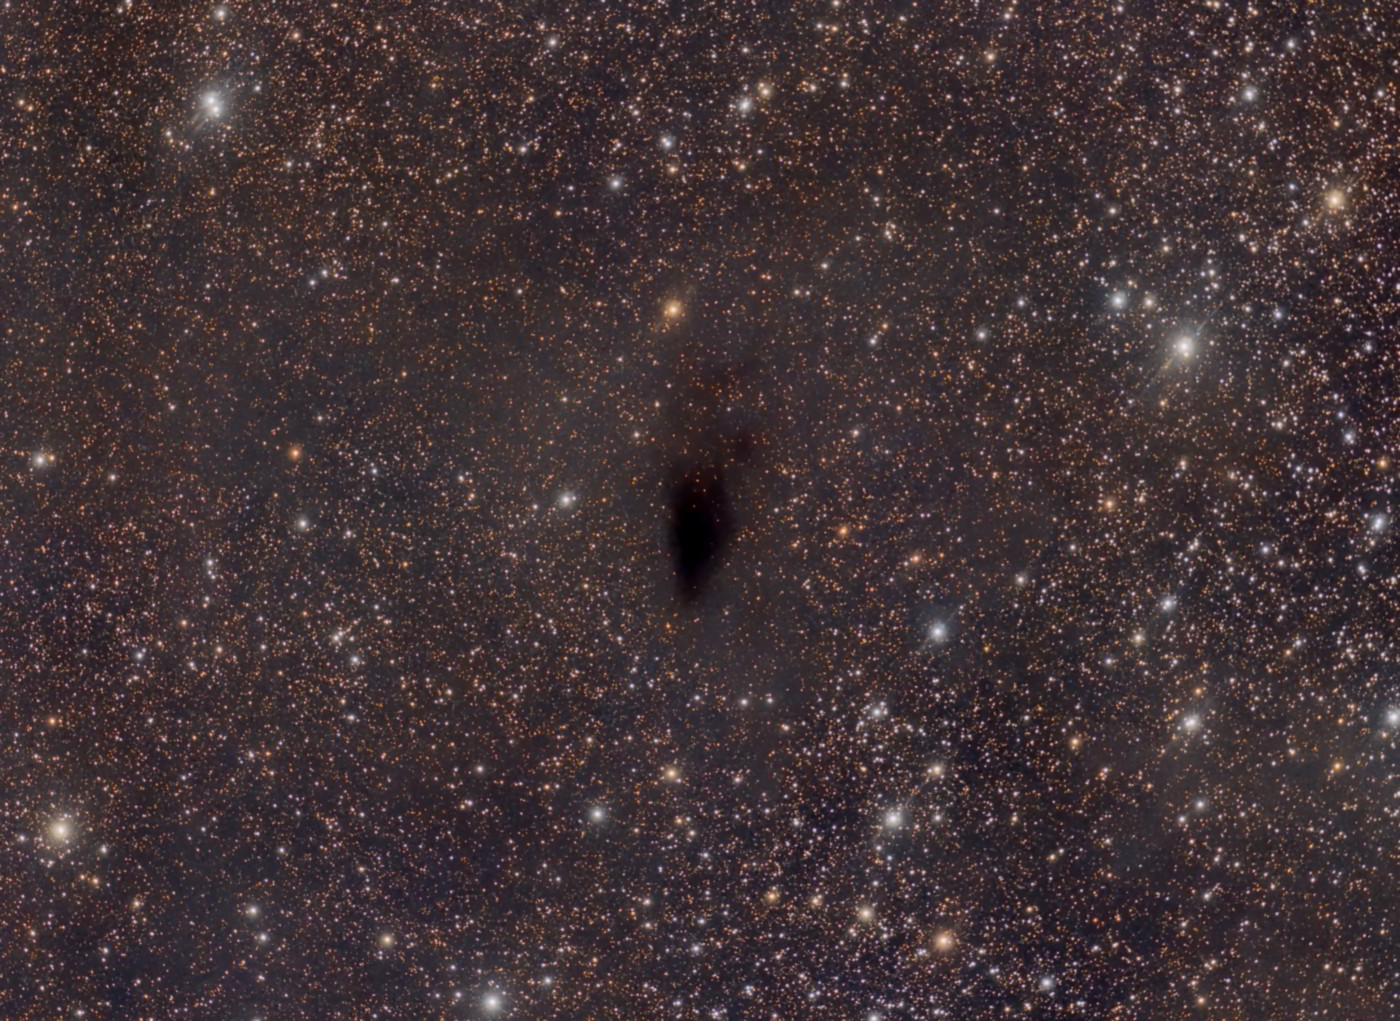
Last Saturday evening was crisp and clear with a waning moon. As I have an interest in dark dusty things I selected Barnard 15 as the target. Outside of the main plane of the Milky Way, this dark nebula is very black and sharply defined against a background of uniformly bright stars. Also in the frame are Barnard 16 & 17 along with much fainter dust clouds.

The lack of stars in front of B15 indicate that it’s pretty close to us. These clouds are dark due to the presence of sub-micrometre dust particles coated in frozen nitrogen and carbon monoxide. Also present is molecular hydrogen, atomic helium and C18O along with a cocktail of exotic molecules.

This is an update of the image I posted on Facebook with a more aggressive noise reduction process early in processing. Consequently, I’ve been able to stretch the contrast more to emphasise the fainter dust structures and apply a stronger colour saturation to the stars.

37 individual exposures of 10 minutes each were gathered before the moon rose for a total of a little over 6 hours.

Barnard 15

Categories
Deep Sky Nebula

Kelling Heath – Autumn 2014

After getting back to using my Astrotrac at the club’s Haw Wood star party I decided I’d like to do some more of the same at Kelling. There was an ulterior motive as well; since building and setting up the observatory there’s rather more work involved in stripping it all down to take into the field.

Once committed to the Astrotrac the choice of lens was made. The Canon 75-300 zoom works really well at shorter focal lengths and is ideally suited to unguided imaging with the Astrotrac. The camera was my QHY9 which had to be removed from it’s permanent home on the back of the Tak.

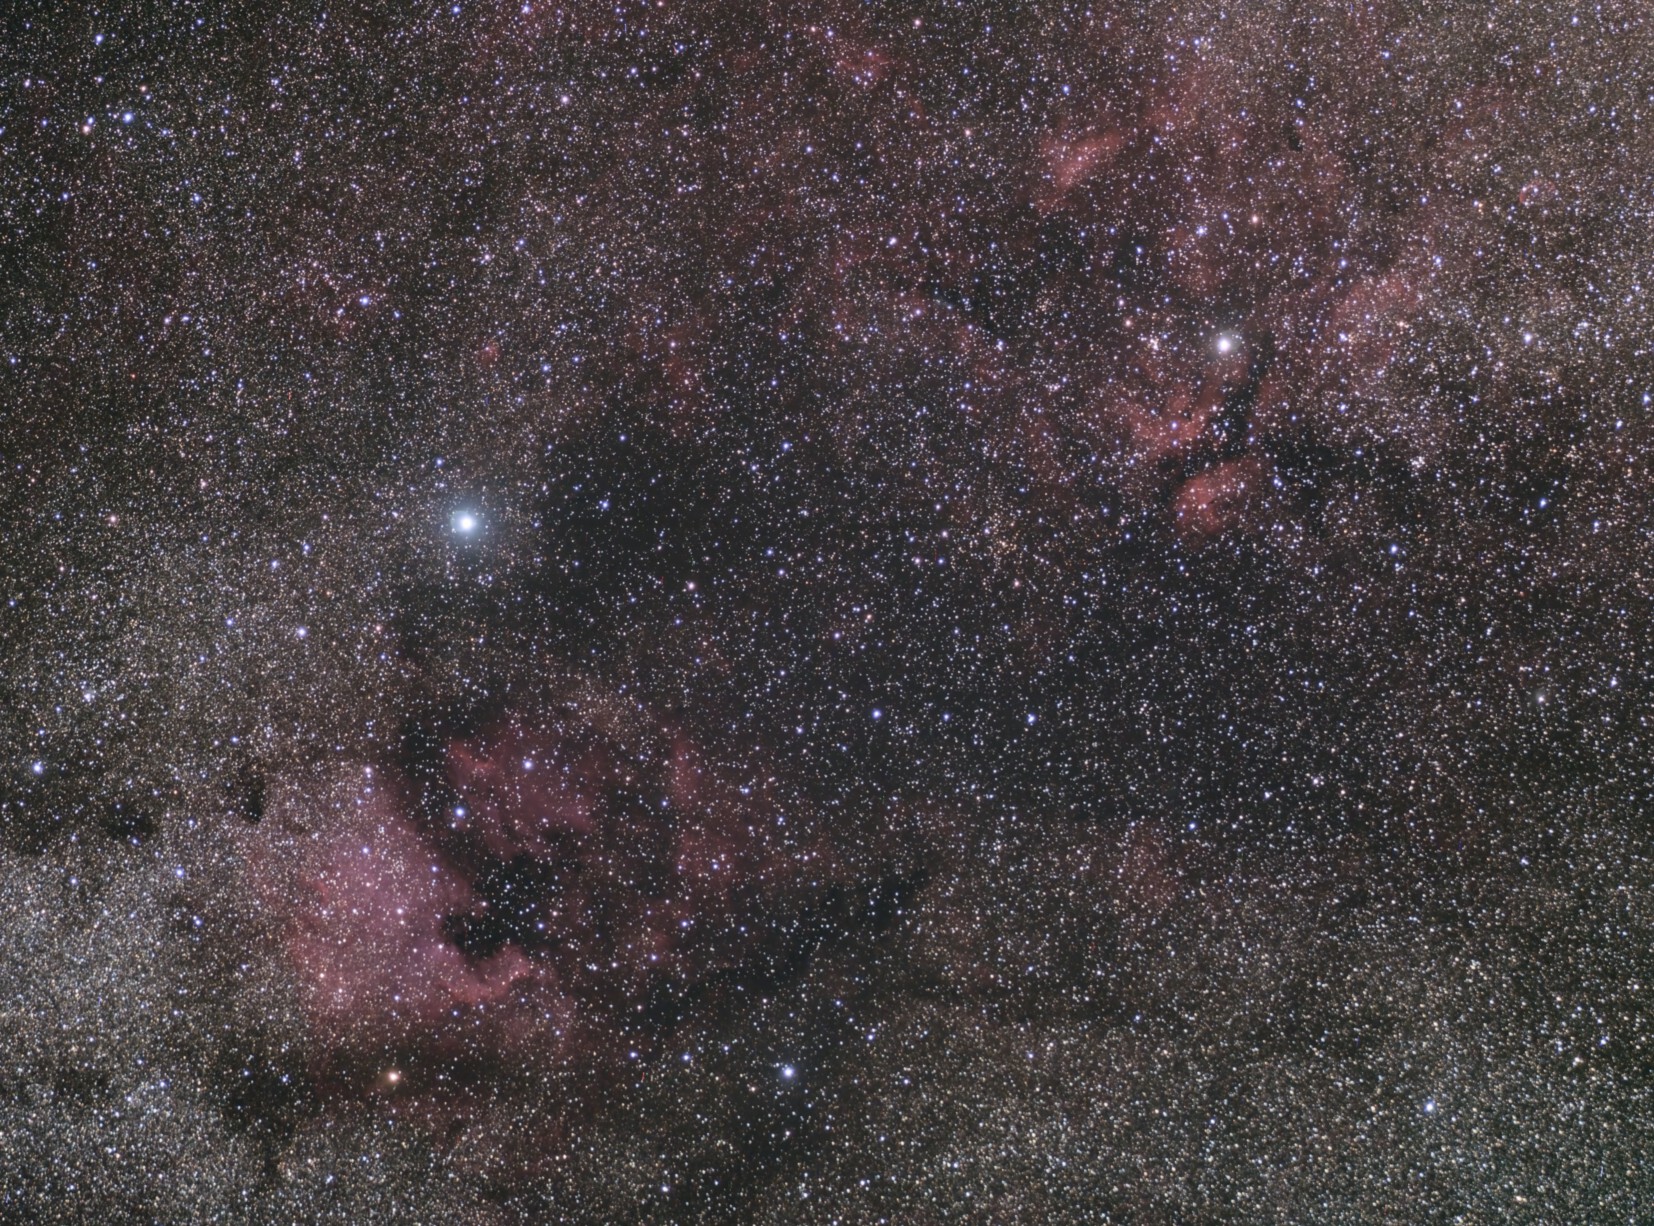
Once the sun set on Friday evening the sky cleared quite nicely, rather hazy with a lot of moisture but better than a lot of the skies we’ve had this year. As my pitch was completely over-hung with trees I negotiated with a neighbour for a corner of theirs. Once setup, Cygnus was close to the zenith so I started there aiming the red-dot finder between Deneb and Sadr taking some short exposures and then re-framing. Once done, I set a sequence of 5 minute exposures and left the Astrotrac to do it’s thing for the remainder of it’s 2 hour tracking time.

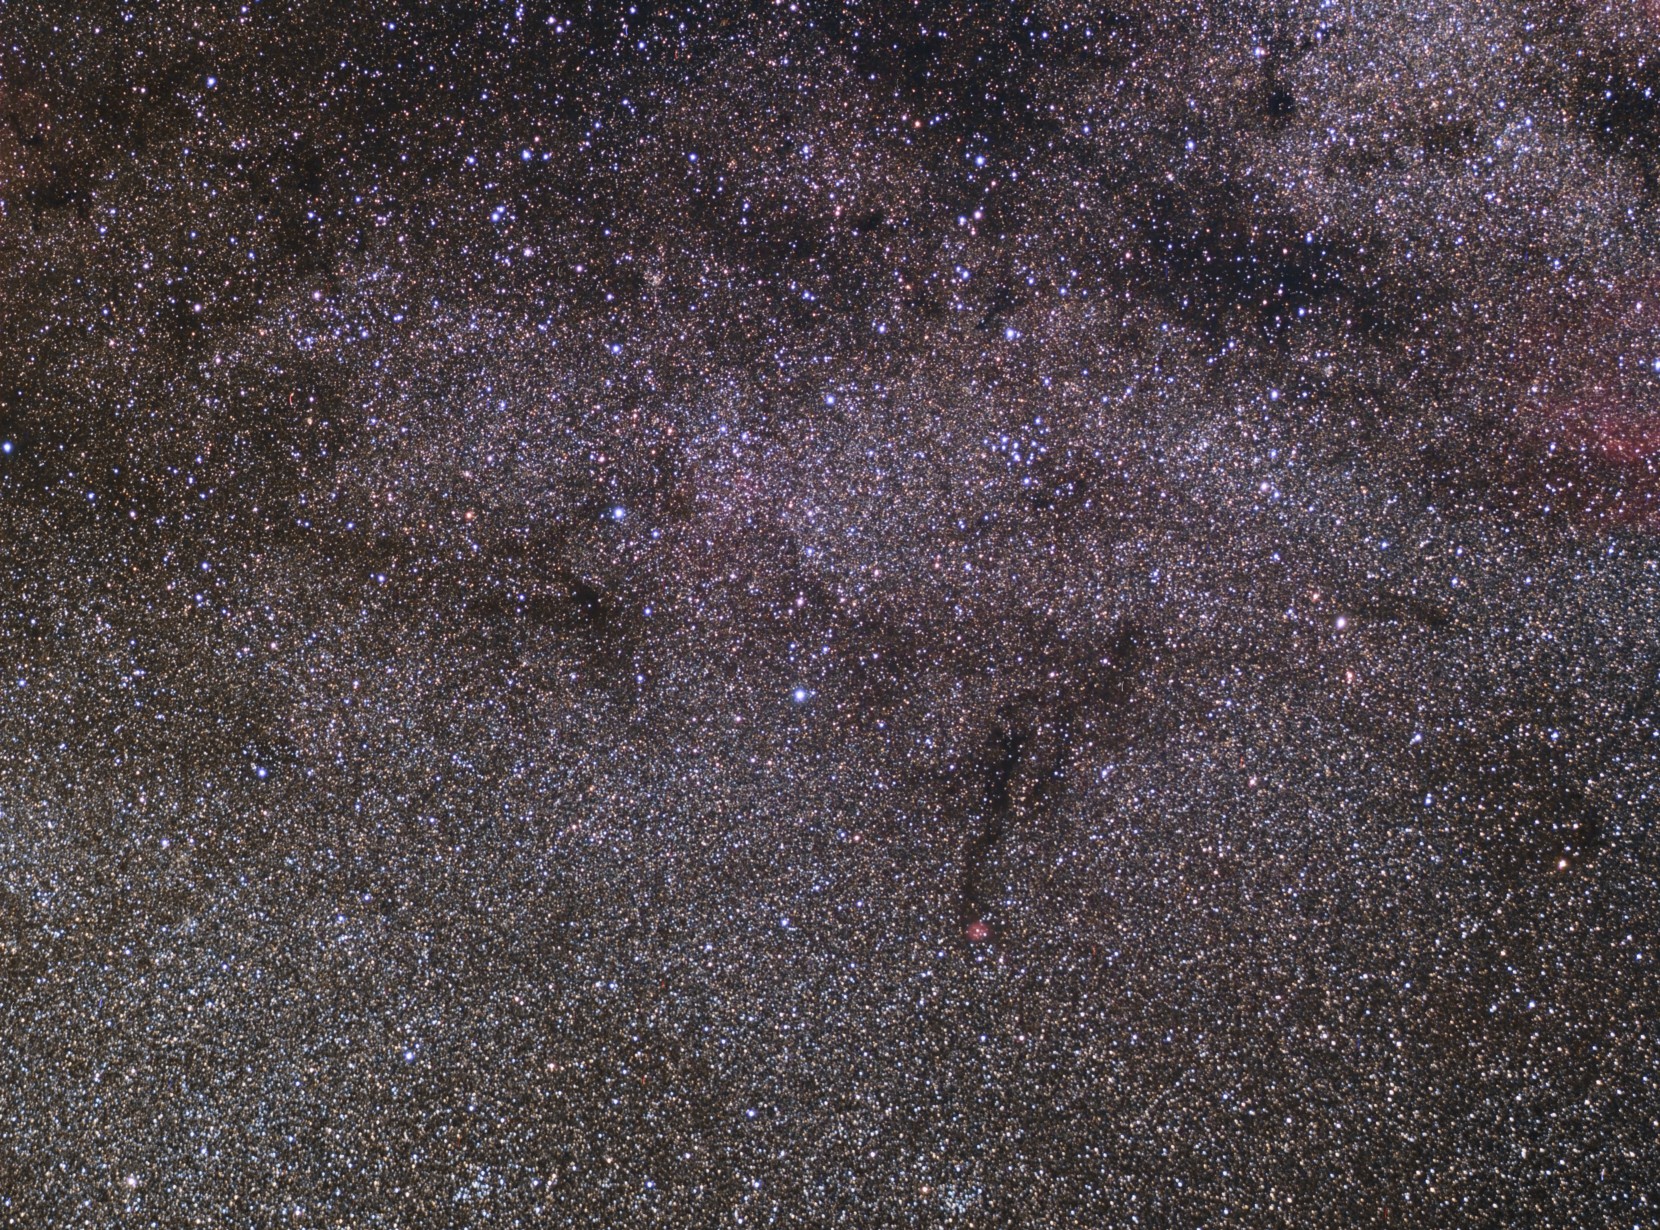
CygnusOnce that had completed I moved the setup along the Milky Way towards Lacerta aiming for the dark nebula B168. The procedure was repeated and then, finally I moved to Auriga. By this time two things were apparent; 1) The skies were closing down and 2), after a week at work I was ready for bed so I cut this session short and headed for the van. Packing up with the Astrotrac consists simply of splitting it into parts small enough to fit in the van and stowing them in the cab in front of the seats.

CocoonSo, just one night of imaging this time but rather more hours than we got at Haw Wood. That’s just the way it goes.

Categories
Deep Sky

Sharpless 2-91

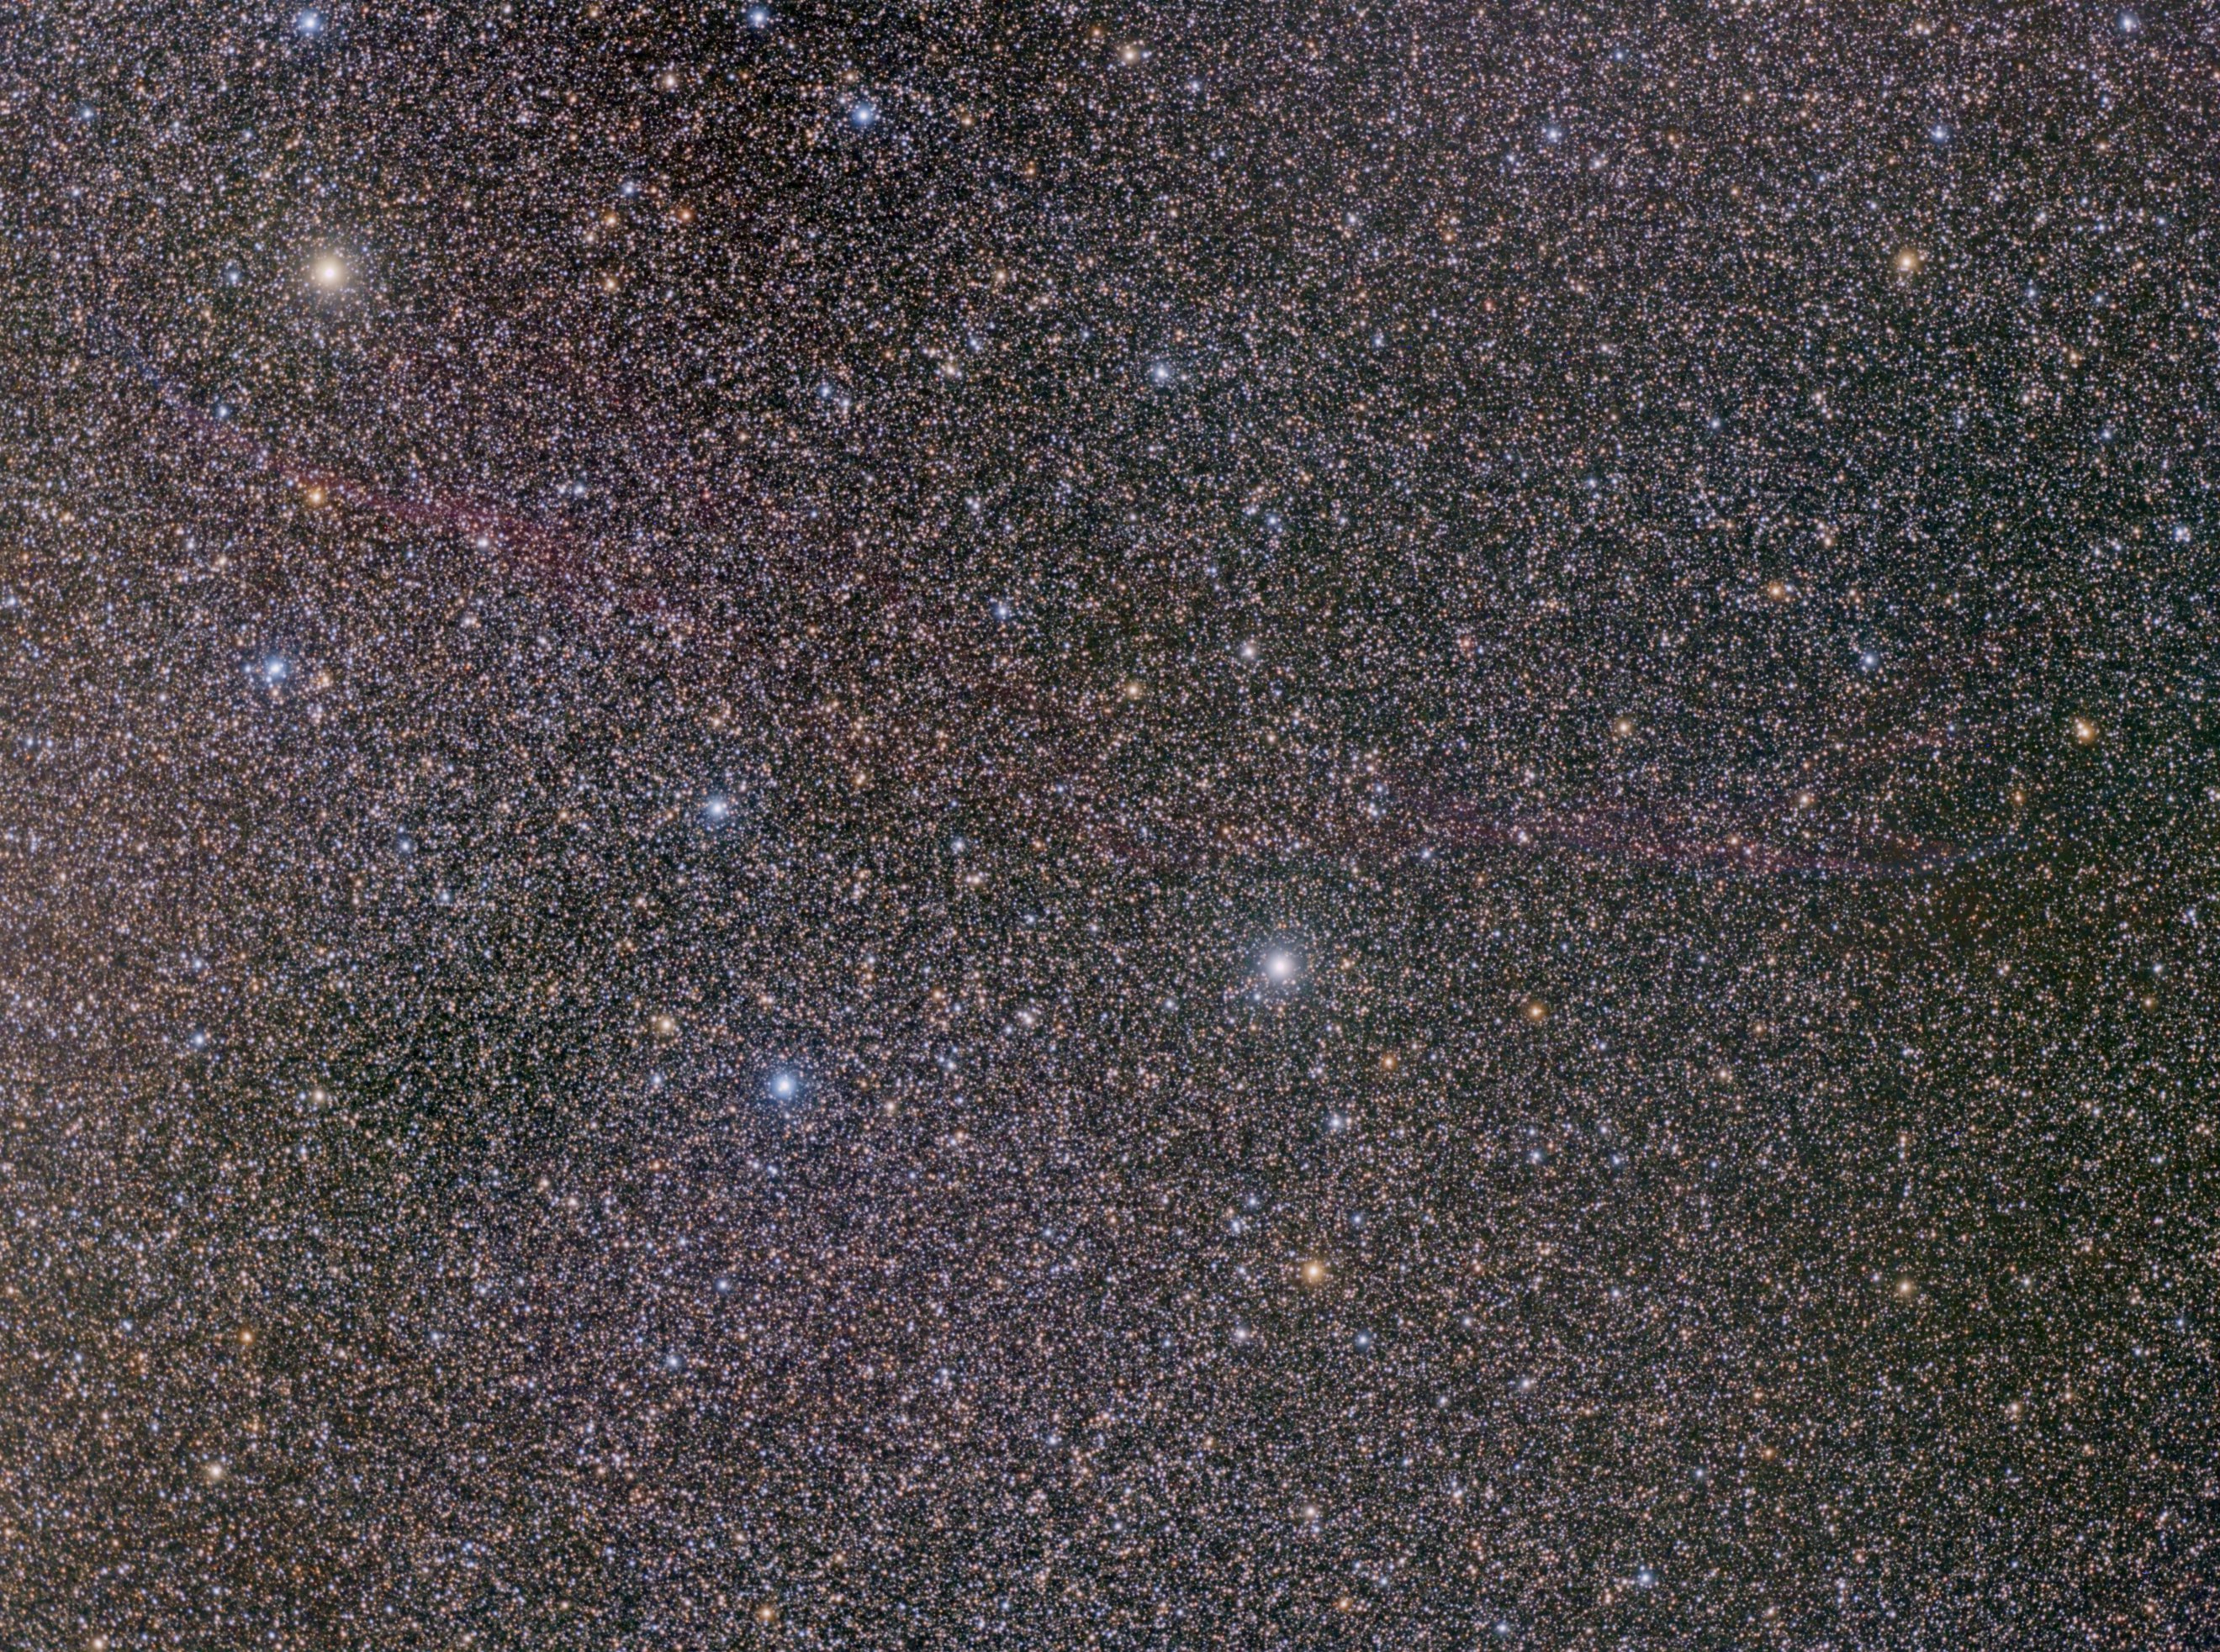
Approximately 20,000 years ago a star in Cygnus ended it’s life in a violent explosion. The shockwave from the blast started travelling outwards and what we’re left is the remnant SNR 065.2+05.7. The intervening time has the remnant spanning about 70 parsec and subsequently it’s very faint.

This is my second attempt at one of the brighter filaments of this structure, Sharpless 2/91 and comprises 6 hours of 10 minute exposures. It’s reproduced here at 80% of the original image size.

sh2_91_new

Categories
Comet Nebula

Haw Wood star party

The skies didn’t clear until 4am on Sunday during the weekend of the Breckland autumn star party at Haw Wood Farm. By then the winter constellations were rising and this posts subject makes an early appearance this year.

I’d gone equipped with the Astrotrac and Canon 75-300mm zoom lens. Using this with the QHY9 camera requires a Geoptik adapter between the two. As the focus adjustment on this lens is so sensitive I’d previously purchased a set of fine focus rings that clamp to the lens and provide a fine adjustment as well as locking the focus once achieved.

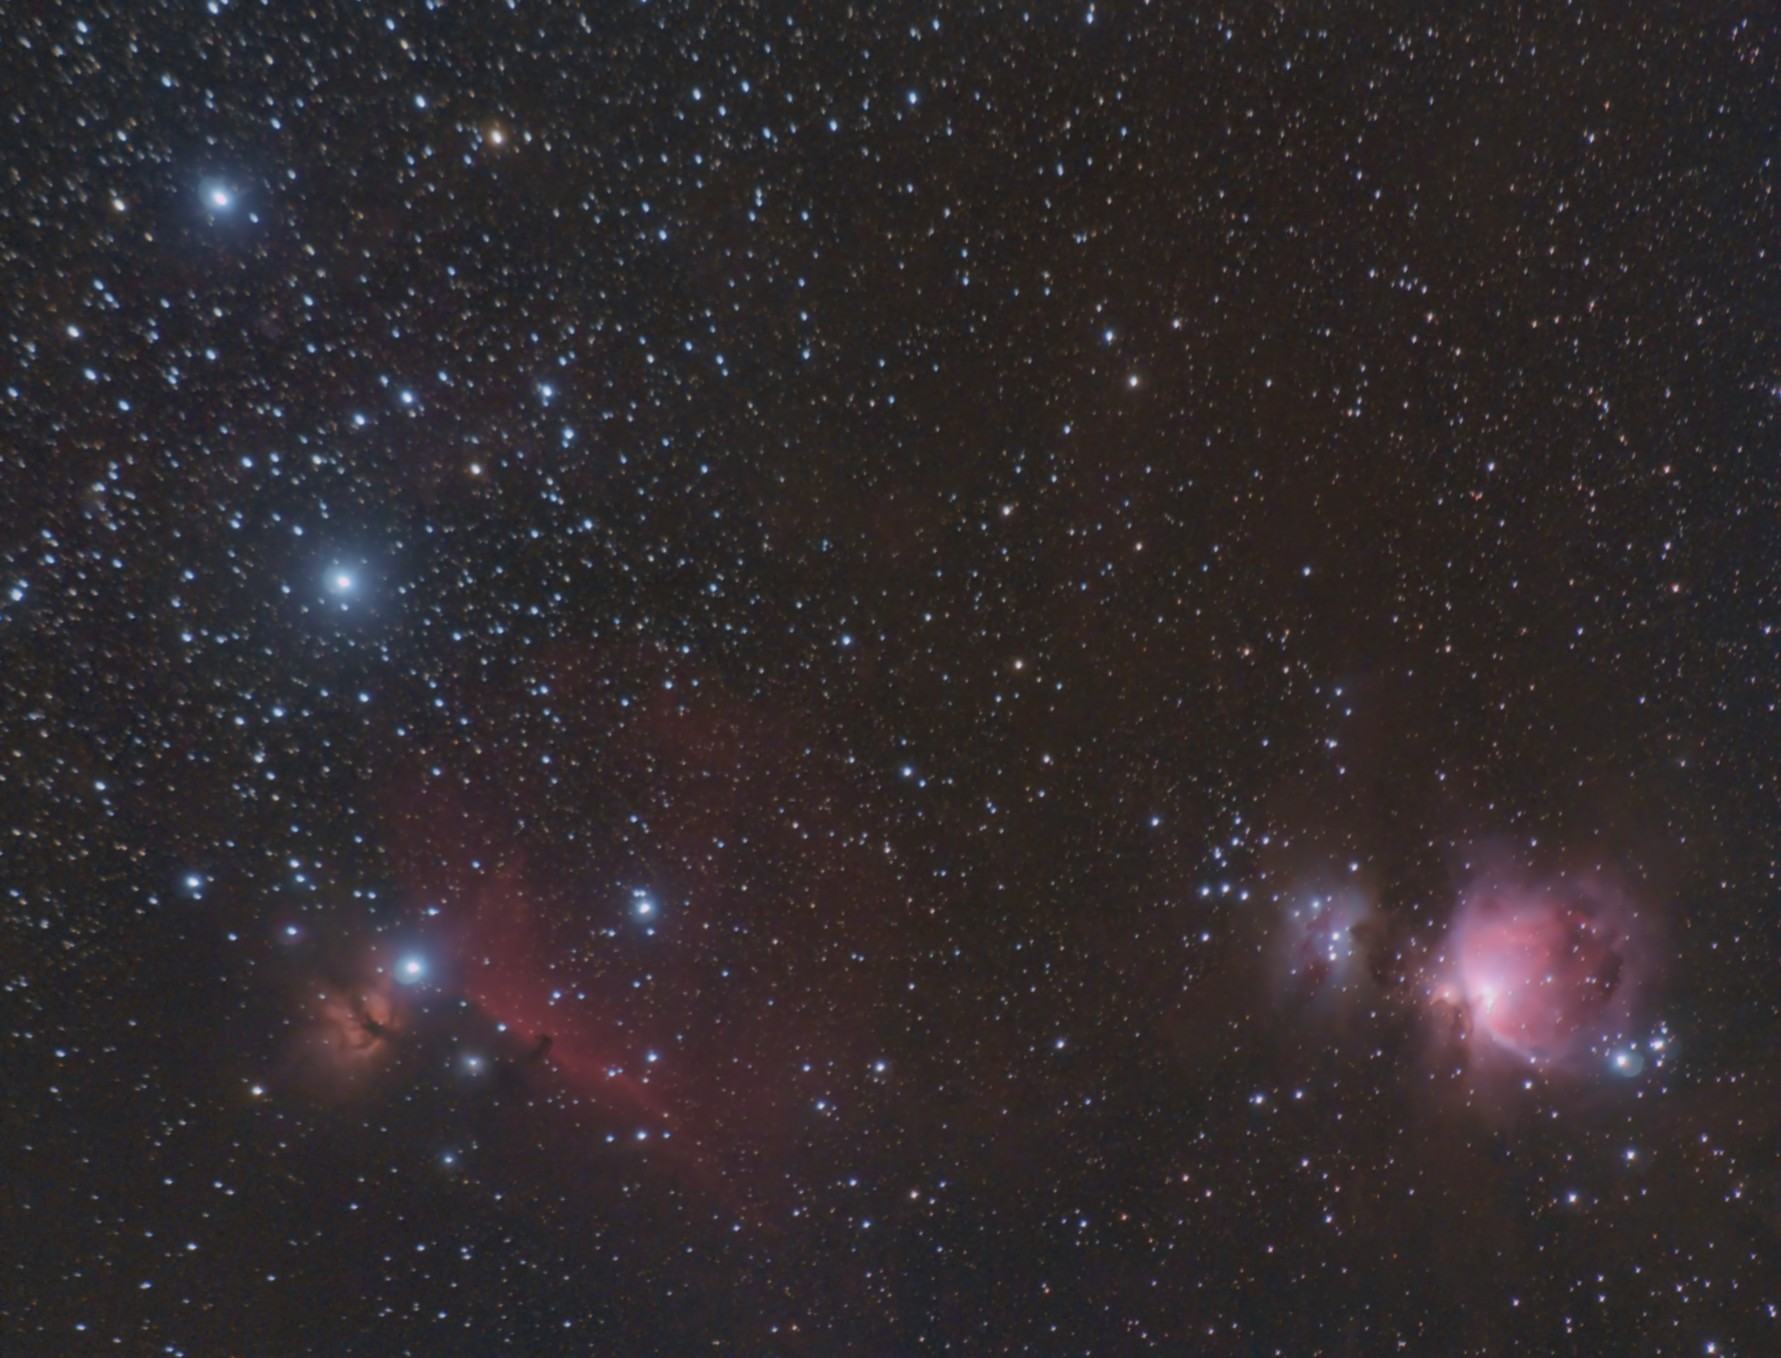
Before the sky got too light I acquired 11x 5 minute frames of the belt region of Orion along with some dawn sky flats. Processed in Pixinsight.

Orion_MT

Categories
Deep Sky

Lynd’s Bright nebula 534

I attempted this object last year using the Zenithstar 70mm and resolved to make another attempt with more exposure and a darker sky. This year I’ve assembled a lot more exposure time (8 hours in 10 minute sub-frames) over several evenings using the Baby-Q. The location is still my garden though so I didn’t manage to find darker skies.

LBN534This time I’ve managed to capture more colour in the stars. In addition to the main nebula there are also fainter dust clouds visible in the image this time.


Categories
Equipment

Setting up a Pulsar Dome (Pt 2)

In part 1 we looked at getting a Pulsar dome to follow movements of the telescope when slewing from within Cartes Du Ciel. This time we’ll build on this foundation and add Maxim DL to the mix.
Recall from part 1 that both EQAscom and Shelyak dome driver have only POTH connected to them. POTH intercepts mount movements and calculates dome movements to match. This is required as the planetarium does not have the ability to connect to a dome.
Maxim DL does have the ability to directly control a dome so by connecting it’s dome output to POTH we can control the dome either via Maxim or the planetarium. POTH acts as a hub enabling us to connect more than one program to a single device. The telescope device EQAscom also acts as a hub and multiple programs can be connected to it, however, by connecting Maxim to POTH we can ensure that the system waits for the dome to finish it’s slew after any telescope move.
All of the dome slaving measurements that we made previously have to be entered in Maxim as well from the Options button on the dome tab of the observatory window. The setup screen specifies inches as the unit of measurement but this is not important provided the same unit is used for all values within this screen. Don’t forget that the dome size is specified here as the radius and not diameter.
The telescope type should be set manually as German Equatorial and the pier side as ASCOM Normal. These setting are available from the observatory setup tab’s Options button.
The dome home azimuth can be set but leave the sync option unticked as the driver will do this for us.
And that’s it! Additional programs can be connected provided you follow the same rules as we’ve adopted here for Cartes Du Ciel and Maxim. If you’ve entered all of the measurements and the home azimuth position accurately then the dome should follow the telescope as it slews and tracks around the sky driven from both Maxim and your planetarium program.

Categories
Equipment

Setting up a Pulsar dome

Having recently worked through the issues of slaving a Pulsar dome to a telescope and helping someone else through the same process I thought it would be useful to document the setup here.  I have an Avalon Linear Fast Reverse mount but from a software point of view this is identical to an EQ6 and I use Maxim DL for image capture, CCD Commander for automation and Cartes Du Ciel as a planetarium. With a few peculiarities, the setup is applicable to other programs that you may be using.

The first step is to run the Shelyak Test_DomeTracker.exe program. This is supplied on the CD and you’ll need to run ‘Do Calibration’ several times. What you’re looking for is that the number of steps per rotation remains very similar from run to run. Any large differences here means that mechanical problems are causing you to lose steps. This must be rectified before continuing. Make a note of the number of steps per rev and acc/decc steps obtained.

Next up we need to run POTH which is available in Scope-Dome hubs under the Ascom Platform 6 program group. We need POTH because we can only connect one program to the Shelyak ASCOM driver. With POTH, we connect it to the dome driver and then connect our other programs to POTH. There’s a fair amount of information to add to the dome setup screen and it will require some careful measurements of your mount and pier and it’s position within your dome. Within POTH, click Setup. If dome data isn’t displayed then press Dome>> to expand the screen.

Click ‘Choose Dome’, select the Shelyak ASCOM dome driver and click Properties.
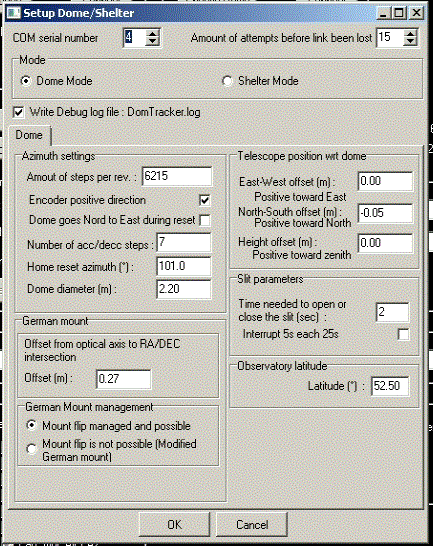
Capture1Enter your COM serial number, then look at the Dome Azimuth settings. Enter the values you obtained from your calibration runs, your best guess for the home azimuth position and the dome diameter (in metres). Now we need some measurements from your dome and mount so a tape measure will be required.

All measurements are made from an imaginary point at the intersection of RA and DEC axis on your mount. This will be inside the body but make an estimate of it’s position. From this point make the following measurements:

  1. Any East-West offset referenced to the dome. Usually this is zero but check to make sure
  2. Any North-South offset, again referenced to the dome. If there’s any offset, it will usually be to the south so this will be entered as a negative number
  3. The height of the intersection above or below the base of the dome hemisphere

All these measurements are made in metres and are entered in the relevant dialog boxes under ‘Telescope position wrt dome’.

You’ll need one more measurement; the distance between the intersection and the optical axis of your telescope. Don’t forget that a top mounted guide scope will significantly increase this distance. This is entered as the German mount offset and you’ll also have to set the mount management here as per the illustration above. Click the OK button

Once all this information is entered you’re most of the way there. Now we check the home position azimuth that you entered.

Start the test_ASCOM_DomeTracker.exe program from the CD, check the Setup dialog to ensure the information you entered is all correct and then Connect.
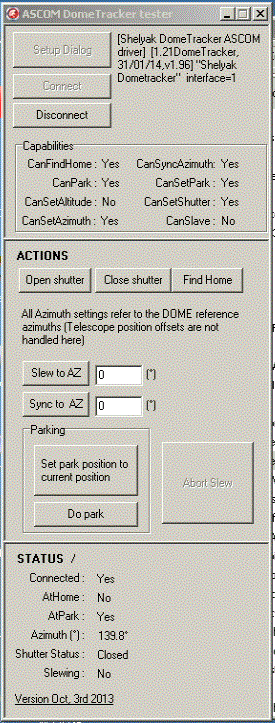
Capture2

Park the mount so it’s pointing due north and using the Actions buttons in the program ‘Find Home’. The dome should move to it’s home position with the silver tape in front of the sensor. Next Slew to AZ 0 degrees and the dome slit should end up directly in front of the telescope. Failure at this point indicates that either your tick count or home position is incorrect. As you’ve carefully made multiple calibration runs earlier we’ll assume it’s the home position. Using the setup dialog, make an adjustment to the home azimuth setting and re-home the dome. Slew to AZ zero again and compare the dome position to the previous position. Repeat this process until the dome slit stops reliably in front of the telescope when slewed.

It’s worth stressing here that you must get the previous stage setup and working reliably before moving on. The dome must reliably move from the Home position to North otherwise what follows will be an exercise in frustration.

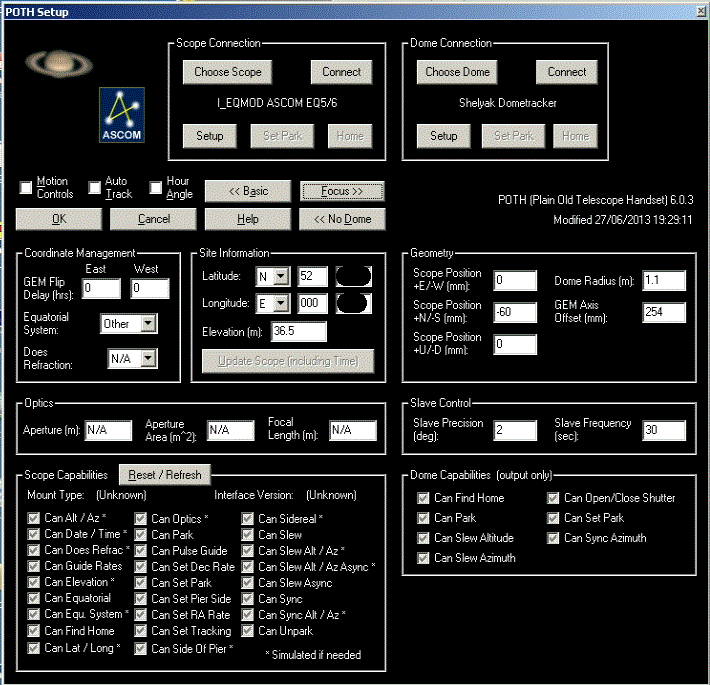
With all this done the dome should be set and it’s time to bring the mount into play. Once again, like the dome, we will connect POTH to the ASCOM mount driver and then connect other programs to POTH. The reason for this is that POTH will intercept mount moves for us and command the dome to move as well to follow the telescope pointing. Using the POTH setup screen choose the EQ6 driver, setup and then connect. The screen should look similar to this:
Capture3

Note that you need to enter your mount/dome measurements again in the Geometry section. Pay attention here as this time the dome radius is required in metres and all other measurements are in millimetres.

In your planetarium program (for this example we’ll be using Cartes Du Ciel) open the telescope dialog and select the POTH.Telescope driver.
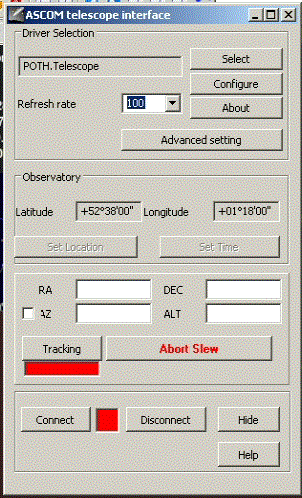
Capture4Once you’ve pressed the Connect button, slews initiated within the planetarium will move both the telescope and the dome in sync.

In Part 2 I’ll look at connecting Maxim.
Categories
Deep Sky Globular Cluster

M4

It’s been a while since I posted here. A good part of that has been the summer weather and general lack of night time at UK latitudes. I’ve also has an observatory build project running which has consumed time but is now nearing completion.

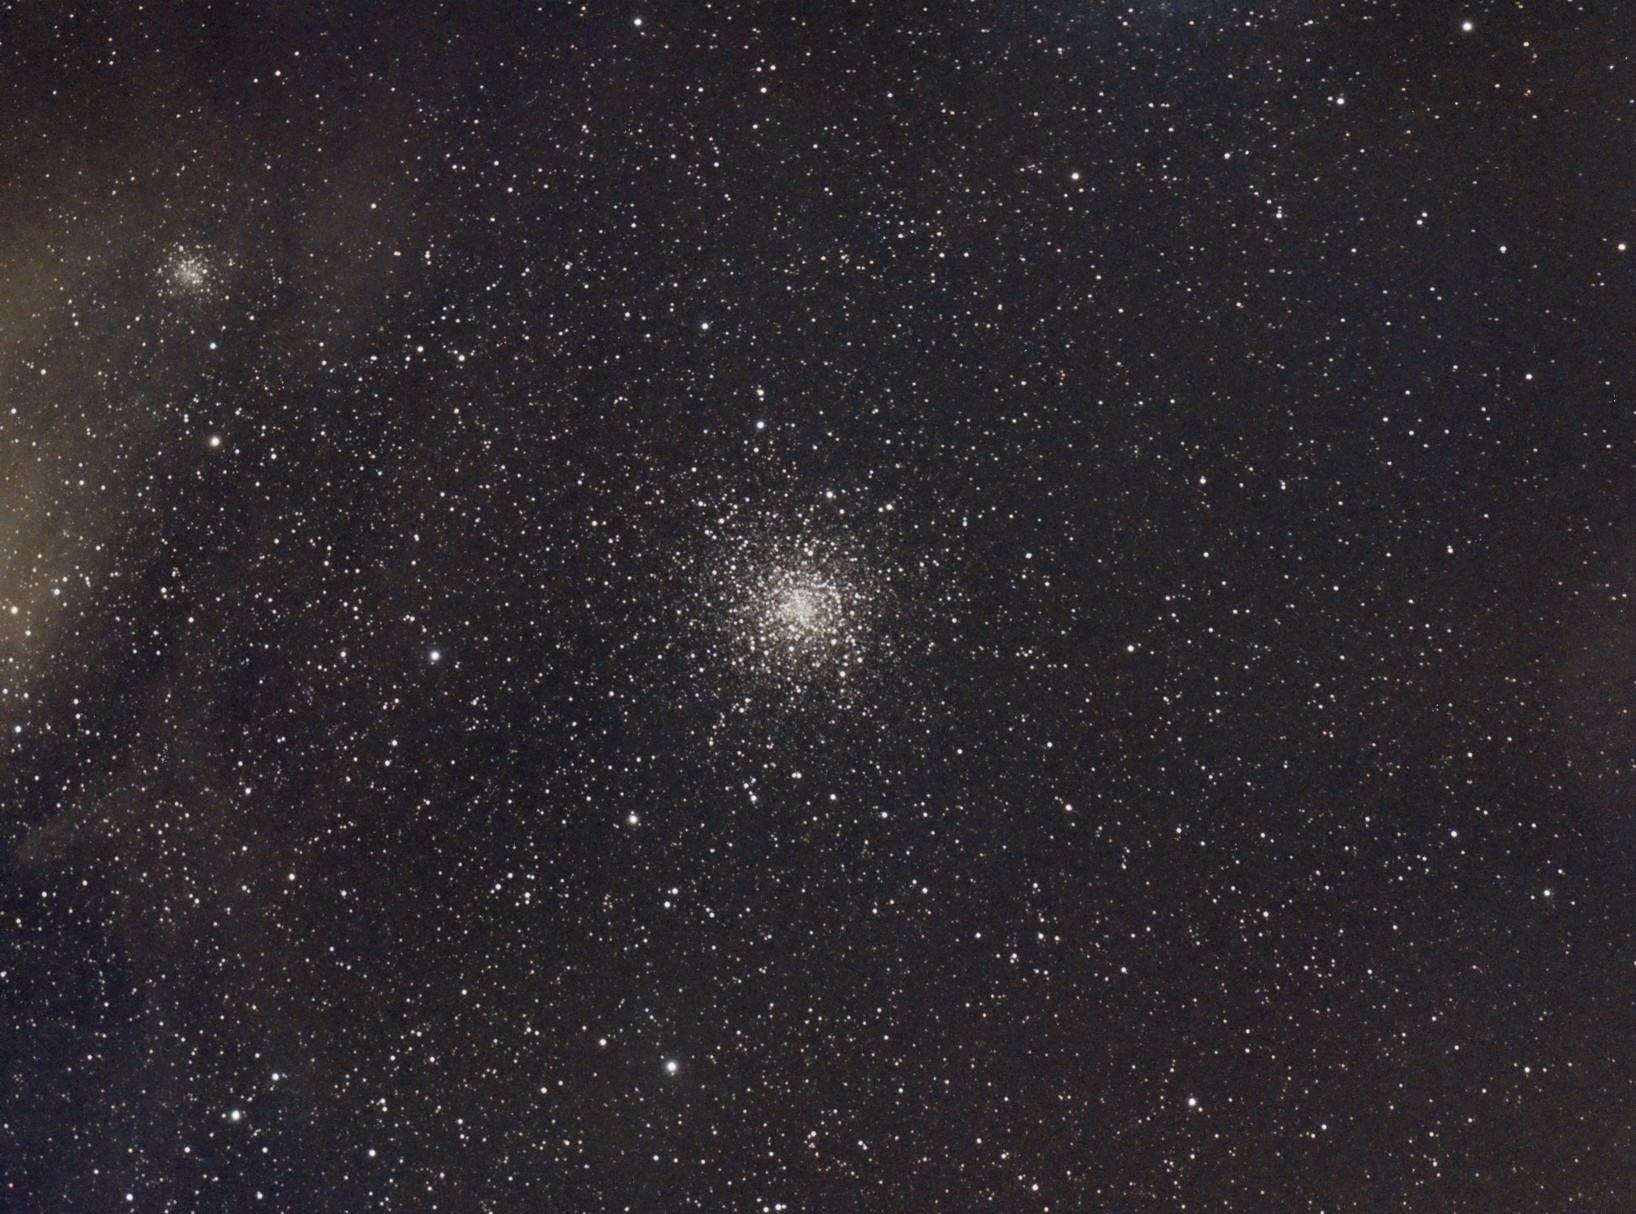
My last post mentioned the globular cluster M4 in Scorpius. M4 never gets very high from the UK and the window of opportunity for taking pictures is really small; really limited to just one new moon period in early summer. The southern horizon at Suffolk was exceptional and whilst scanning the sky with binoculars I noticed that this object was looking as good as I’ve ever seen it from the UK. Due to an oversight when parking the van and setting up the telescope I had the onsite wind turbine directly to the south so had to wait a short while for M4 to clear this and then took 3 10 minute exposures.

With M4 only 10 degrees above the horizon light pollution is normally a big problem and when looking at these images it did appear that I had a sizeable gradient across the image. However, further processing revealed that this is the due to the reflection nebula around Antares (just out of frame) and not the more usual sodium lighting.

…and the AirMass (Relative optical path length through atmosphere) at 10 degrees altitude? 5.1.

M4

Categories
Deep Sky Galaxy

The Suffolk Coast

A bank holiday beckoned and the forecast was much better on the coast for Saturday night so we packed the van and headed for a new destination near the club dark site at Haw Wood Farm. This site is a little further south at a small village called Middleton and closer to the towns of Leiston and Saxmundham than Haw Wood but the light pollution was still pretty minimal for the UK. The site is a Camping & Caravan club certificated site called Golden Acres. It’s a grass field with good horizons spoilt only by a small wind turbine in the middle so site your telescope carefully. The light switches for the toilet block were easy to find and I turned them off after everyone else had gone to bed after midnight and the full beauty of the sky here was revealed.

I started with some more images of my current galaxy project (NGC 4236) but once I’d realised that M4 was an easy binocular object even though it was only 10 degrees above the horizon I took a few 10 minute frames before it got too low. It did feel slightly odd taking pictures with the telescope tube almost horizontal and this is something I’d not be able to do at home with the Thetford light pollution due south of me.

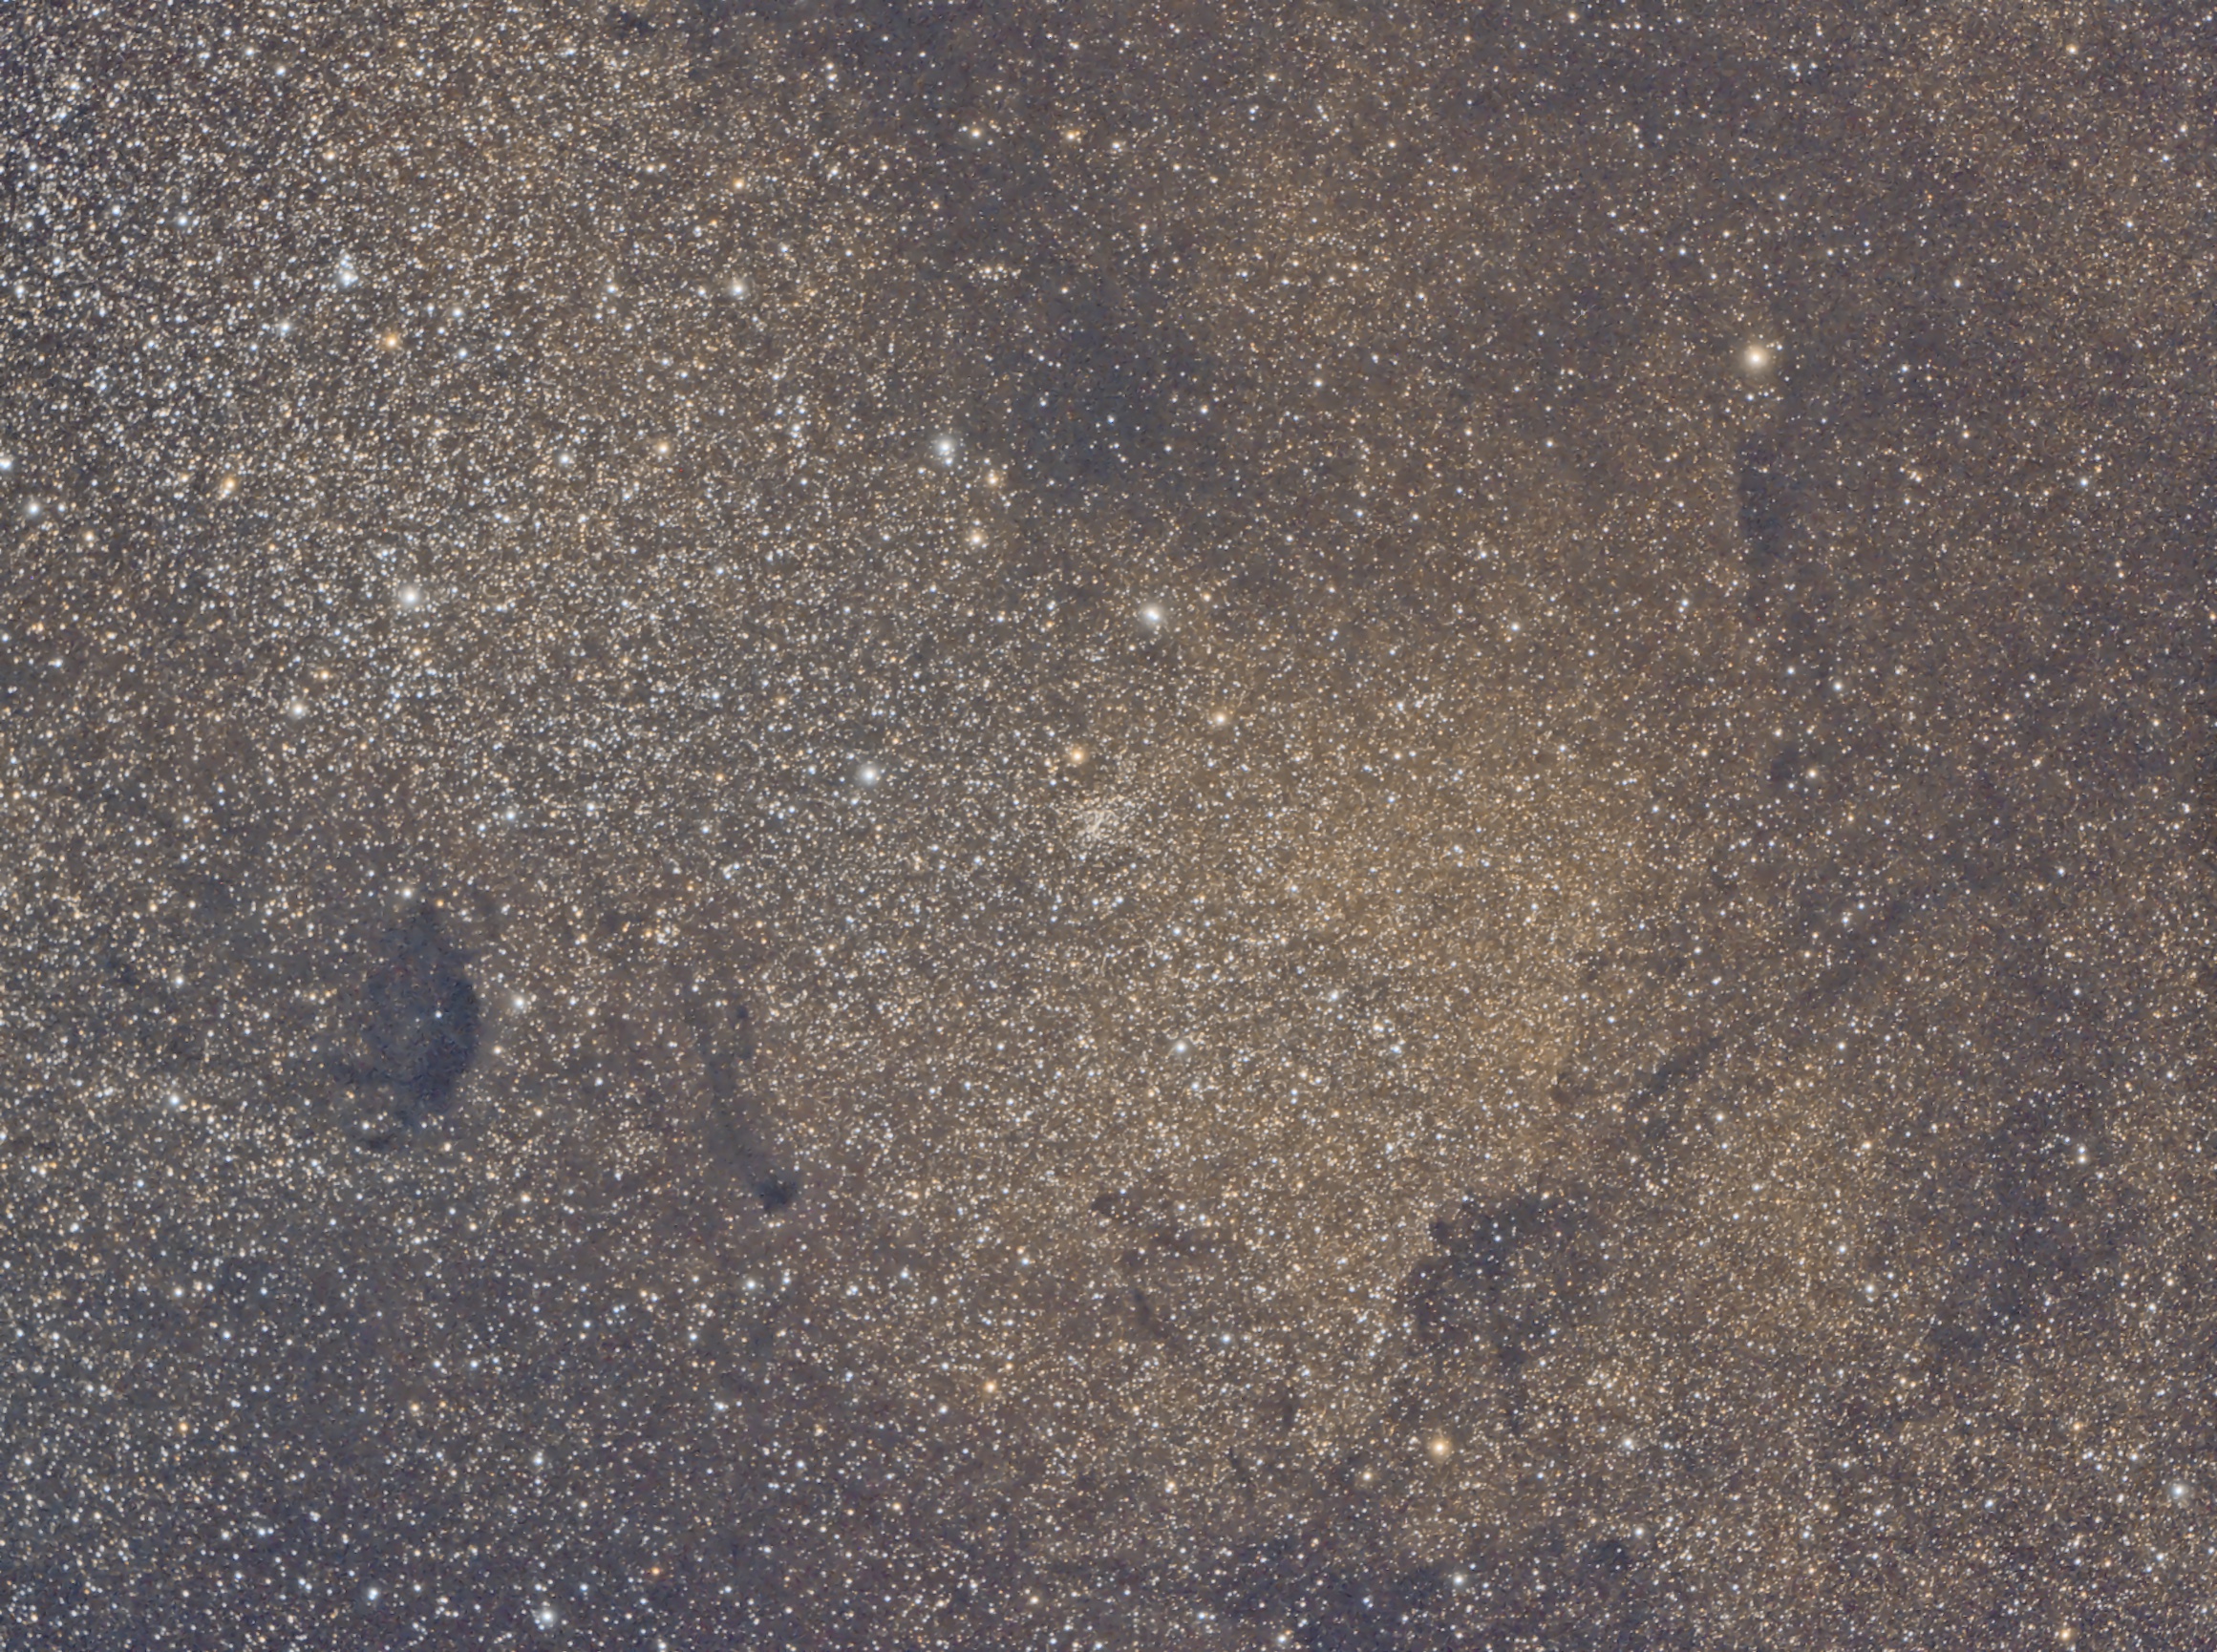
The last picture I took was on the Sunday morning just as the sky was beginning to lighten after 2am. This is the Small Sagittarius Star Cloud (M24) and it was only 18 degrees above the horizon. This is a single 10 minute frame taken with the QHY9 and the Baby-Q, processed with Pixinsight.

Small Sagittarius Star Cloud
Categories
Deep Sky Galaxy

…and the Whale again

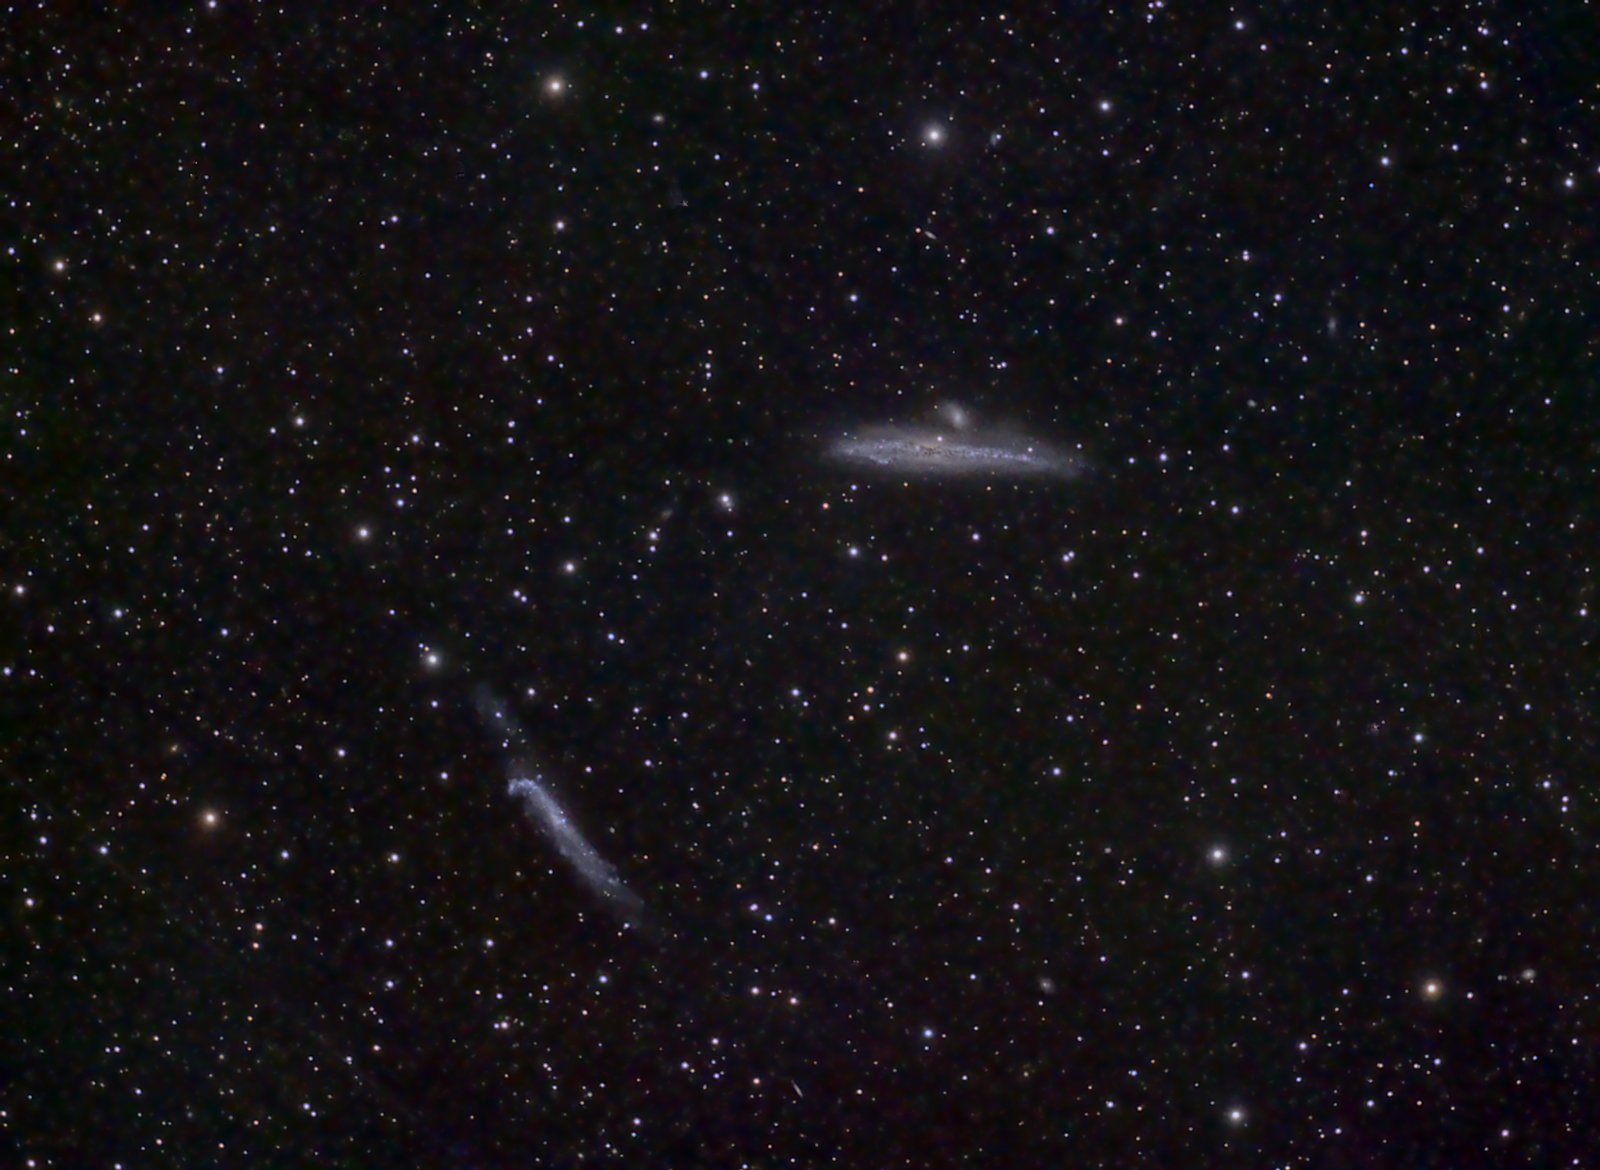
I’m beginning to feel some understanding with Captain Ahab and his obsessive tendency towards Cetacea. This has been rather a mission this spring and with weather keeping the imaging sessions short I’ve had to keep returning whenever possible.

The last two sessions I’ve experimented with increasing the subframe exposure time to 20 minutes. This has some major benefits in increasing the signal to noise ratio with some downsides in increasing bright star saturation and reducing the number of exposures to stack. Some further improvements may be gained by going to 30 minutes but, having shot 9 hours worth of 20 minute dark frames the other night I may as well get some use out of them. A darker sky may be required as the exposure length increases.

To incorporate the new exposures in the existing stack I’ve simply calibrated them and then scaled by 50% using PixelMath to match the existing 10 minute subframes.

I’ve worked rather harder in Pixinsight to retain star colour while, at the same time reducing the colour noise in the background. Star masks are invaluable in this and they’re really easy to create using Pixinsight.

This marks the end of data collection on this target for the year as it’s now past culmination by the end of astronomical twilight and the nights are getting shorter. Total time on this is now about 8 hours.

NGC4631-small